Installation
Q247 can connect to the version control system in two ways: from Q247's secure cloud infrastructure (Cloud Plugin) or through a plugin installed locally, in the Client's infrastructure (Private Plugin). Functionally both modes work the same; they differ only in where the scanning process physically runs.
Deployments are managed in Configuration, in the Plugins section. Each deployment has its own mode marker on the list, Cloud or On-Premise, and its own list of Connectors.
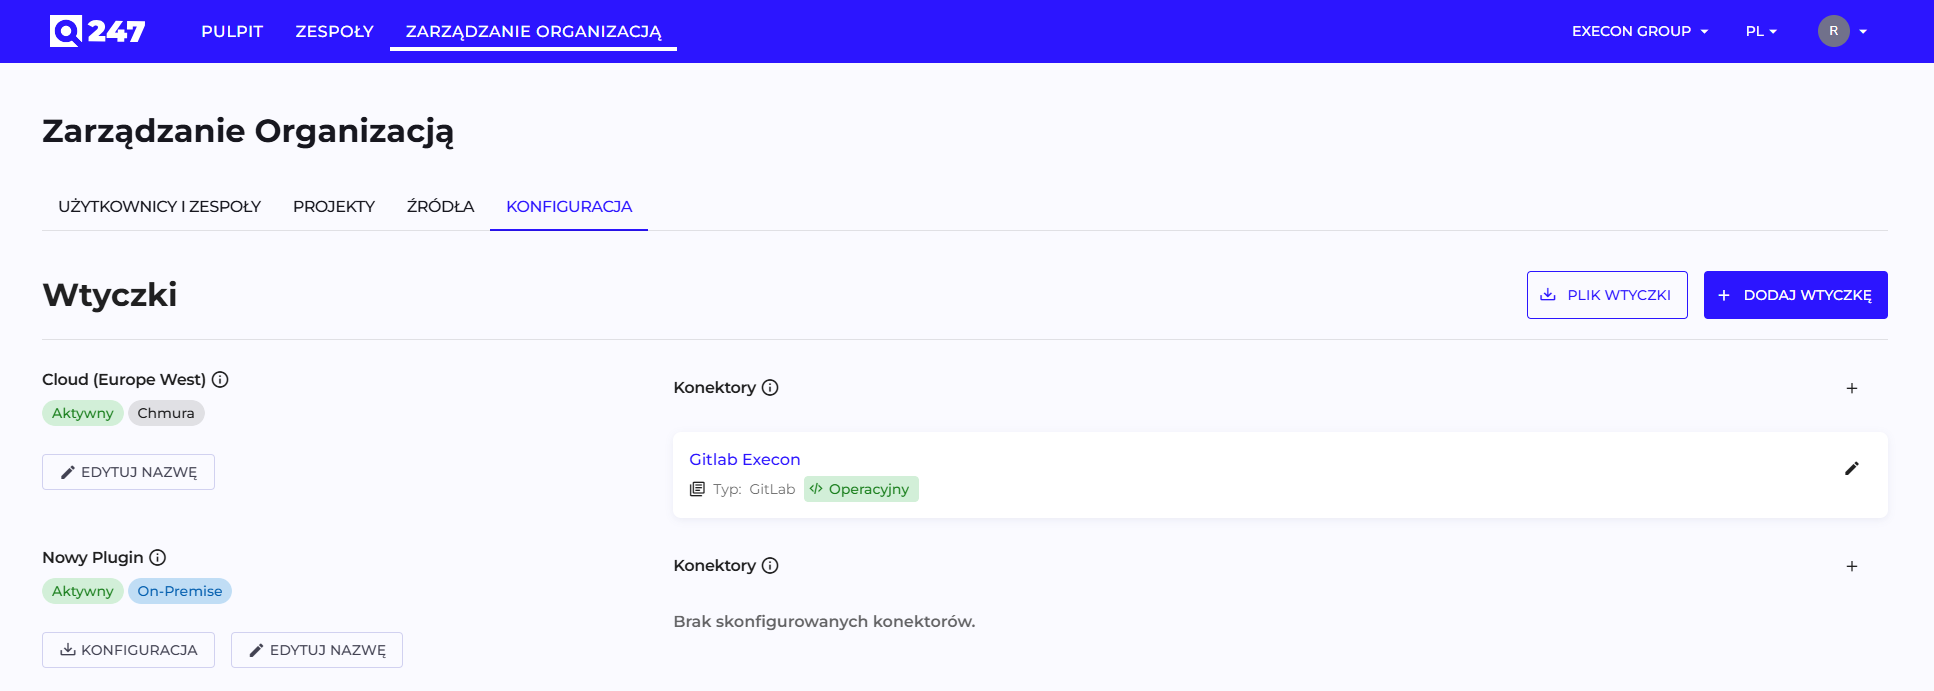
Cloud Plugin
This is the default mode. It requires no configuration in the Q247 UI, nor any involvement from the Client's DevOps team, apart from one thing: opening network access from the Cloud Plugin to the Client's SCM system. Cloud Plugin is available to every client and enabled by default.
At the Client's request, an additional layer of security can be added between the Cloud Plugin infrastructure and the Client's infrastructure, for example a dedicated VPN channel. Full security details are described in Enterprise Plugin Security.
Connection requirements for Cloud Plugin
Network routing has to be opened between the Q247 cloud plugin's outbound address and the REST API endpoint of the Client's SCM system. The current address is provided by the Q247 deployment team.
Private Plugin
The Client creates its own deployment in the panel, downloads the configuration file and the plugin file for it, and runs the process in its own infrastructure.
1. Creating a deployment
In Configuration, in the Plugins section, the Add Plugin button opens a form with a single field.
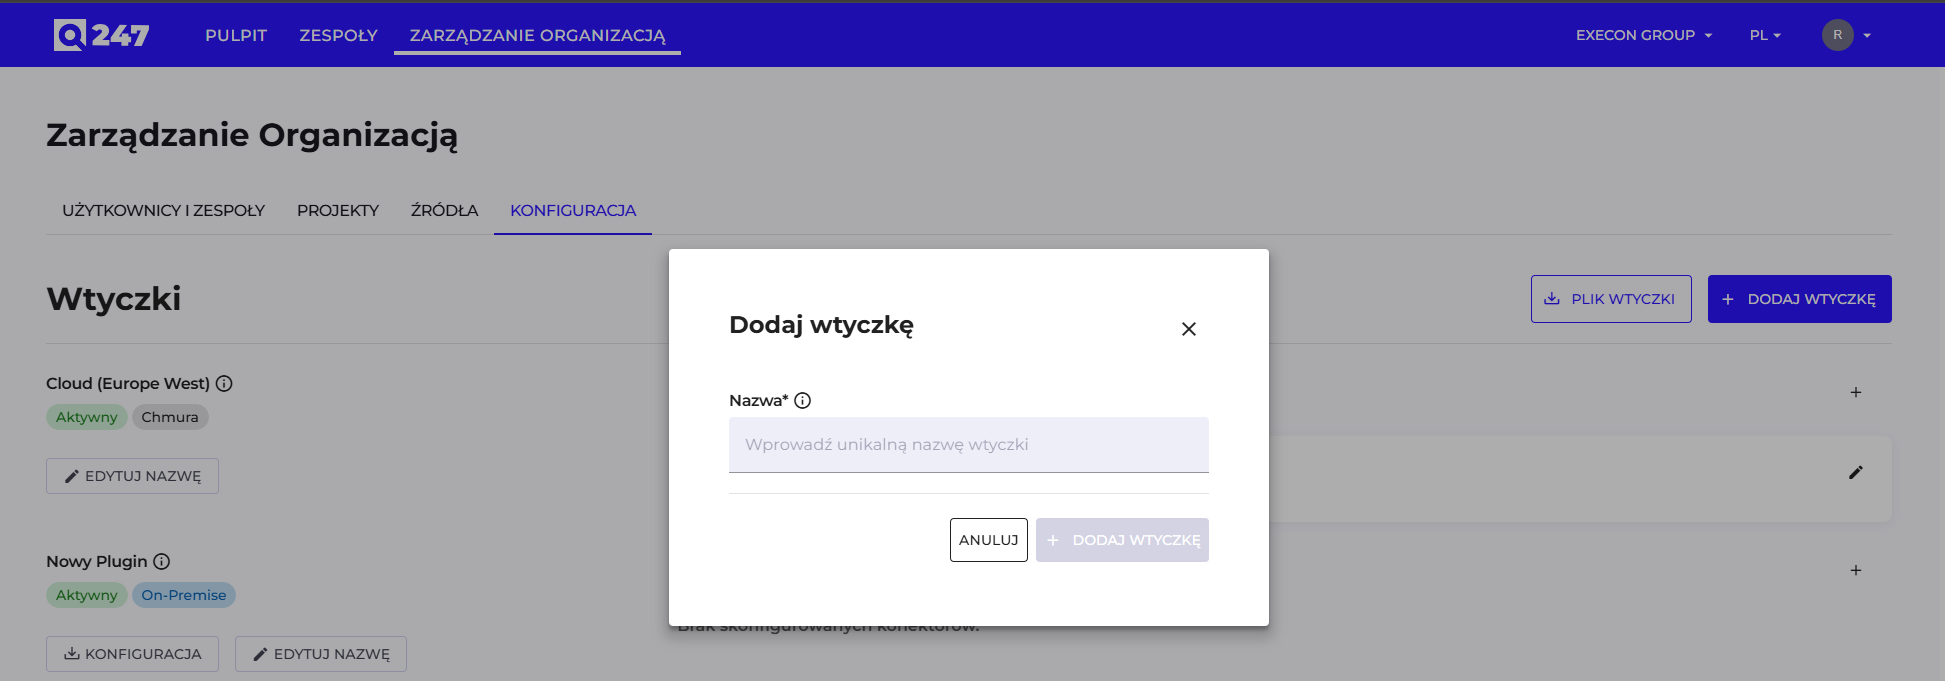
| Field | What to enter | Example |
|---|---|---|
| Name | a unique deployment name, to recognize it on the list | Warsaw Plugin |
Once confirmed, the deployment appears on the list, marked as On-Premise, with an empty connector list.
2. Downloading the files
Two files are needed, and they are downloaded from two different places:
- Config, a button next to the specific deployment on the list. Downloads the configuration file generated for that deployment. The button appears next to On-Premise deployments.
- Plugin File, a button in the header of the Plugins section. Downloads the latest version of the plugin itself. It appears once the organization has at least one On-Premise deployment.
The configuration file is generated for a specific deployment, so create the deployment first, and only then download the files. Before adding the first On-Premise plugin, neither of these two buttons is on the screen.
Both files (config.cfg and q247-enterprise-plugin-linux-*) must land in the same directory on the target server.
3. Installation and startup
Starting the plugin:
nohup ./q247-enterprise-plugin-linux-vx.x.x --q247-ep-plugin-prod > q247-plugin.log 2>&1 &
Replace x.x.x with the version number of the plugin file you downloaded (Enterprise Plugin), as it appears in the file name.
Checking whether the process is actually running:
# ps -efww | grep -i q247
q247 1372705 1 5 Apr17 ? 15:59:29 ./q247-enterprise-plugin-linux-vx.x.x --q247-ep-plugin-prod
While running, the plugin uses these files and directories:
q247-plugin.log: plugin logs.q247-working: working directory, where the plugin temporarily stores data fetched from Git repositories.plugin.data,plugin.data-shm,plugin.data-wal: the plugin's local data store files.
The configuration file downloaded from the panel is ready to use. It already contains the backend address and the deployment credentials, and settings such as Jira and Confluence integration support or the plugin's operating mode are prepared by the Q247 deployment team before handing over the file.
Preparing the Client's environment
Beyond simply starting the process, the following requirements must be prepared in the Client's infrastructure.
Network access
The plugin connects outbound: to the version control system, to the Jira, Confluence and Azure DevOps Server instances, and to the Q247 backend. The Azure Boards and Azure Wiki integrations work by polling only, so they add no inbound traffic.
If the Jira or Confluence integrations run in the Data Center variant and ingest data through webhooks, inbound traffic from those instances to the plugin is added. The file downloaded from the panel sets port 443 for HTTPS and port 80 for HTTP by default. The plugin starts one listener: HTTPS if it can load the TLS certificate and private key, otherwise HTTP (TLS certificate for the webhook receiver). Allow traffic through the firewall only to the port on which the plugin is actually running and enter that port in the connector's Plugin server Port field. This is usually the HTTPS port. The traffic stays inside the Client's network.
In API polling mode, the plugin connects to Jira and Confluence outbound only, and the connector form does not show the plugin server fields then. → Ingestion method in Jira and in Confluence
The Client's infrastructure administrator sets non-default ports in plugins.http.port and plugins.https.port in config.cfg. The following fragment of the plugins section sets port 60080 for HTTP and 8443 for HTTPS:
{
  "plugins": {
    "http": {
      "port": 60080
    },
    "https": {
      "port": 8443
    }
  }
}
Change only these two values and keep the remaining settings from the configuration file downloaded from the Q247 panel unchanged.
TLS certificate for the webhook receiver
The webhook receiver can work over HTTPS, which requires providing a certificate and private key for the address under which the plugin will be visible to Jira and Confluence.
The plugin will then start with unencrypted listening and keep working, with no error visible in the Q247 panel. Webhook traffic stops being encrypted even though the configuration looks complete, which is why it is worth confirming the certificate at the start of the deployment, not after the fact.
Proxy and TLS inspection at the firewall
If outbound traffic from the Client's network goes through an explicit proxy, its address and any authentication data need to be given to the deployment team. A transparent proxy requires nothing.
If the firewall terminates TLS connections and re-signs them with its own certificate, the plugin will not recognize the Q247 backend's certificate and the connection will fail. In that case the Client provides a PEM file with the corporate CA certificate. The same applies to a situation where the Jira, Confluence or Git server instance has a certificate from a private CA. → Root CA certificate in the configuration file
Root CA certificate in the configuration file
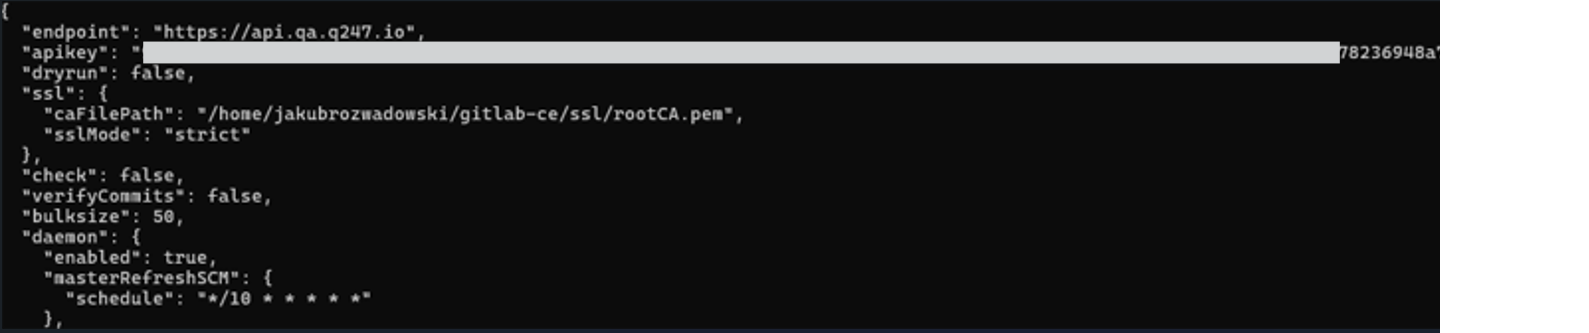
If Jira Data Center, Confluence Data Center or GitLab use certificates issued by an in-house CA (for example generated with OpenSSL, step-ca or AD CS), the plugin must know the root CA certificate to verify those servers. The path to the PEM file with that certificate goes into an ssl section that the administrator adds directly to the main JSON object in config.cfg, next to the existing fields such as endpoint and apikey:
{
  "ssl": {
    "caFilePath": "/path/to/rootCA.pem",
    "sslMode": "strict"
  }
}
Below is an example config.cfg with the ssl section added right after the dryrun field.
| Field | Value |
|---|---|
caFilePath | path to the PEM file with the root CA certificate, stored on the server where the plugin runs |
sslMode | strict keeps full certificate verification enabled |
A single file given in caFilePath applies to all of these servers, so if they use different CAs, put their certificates together in one PEM file. The plugin reads config.cfg at startup, so restart it after adding the section. If the certificate file cannot be loaded (wrong path or missing permissions), the plugin writes an error to its log and falls back to the default verification, and connections to servers with a private CA keep failing with a certificate error.
See also
- Connectors: adding deployments and connectors in the Q247 panel
- Running code analysis: the order of steps after installing the plugin
- Jira and Confluence: integrations handled by the plugin
- Enterprise Plugin Security: firewall rules, encryption, scope of exchanged data